User Guide
FAQ, OBS Setup, and More
Info Free version (GitHub) vs. Paid version (Microsoft Store)
MOJIOKO comes in a free version (on GitHub) and a paid version (Microsoft Store). The core features — automatic transcription, subtitle editing, subtitle burn-in, SRT/text export, and so on — are the same in both.
Fonts
Subtitle fonts are chosen from a set that MOJIOKO provides (this is not a feature for loading fonts installed on your own PC). The free version includes the default font (Noto Sans JP). The paid version lets you download and use an additional set of fonts prepared by MOJIOKO. More fonts may be added in future updates.
Future features
Some features may be added exclusively to the paid version in future updates.
Updates & availability
The paid version is available on the Microsoft Store and updates automatically, so you always have the latest version. The free version is downloaded from GitHub, and you update it manually when a new version is released.
The free version already includes everything you need to create subtitles. You can start with the free version and consider the paid version if you'd like to use the fonts MOJIOKO provides. Buying the paid version also supports development.
Info The 12 additional fonts available in the Paid version
The paid version (Microsoft Store) lets you use the following 12 additional fonts prepared by MOJIOKO for your subtitles (4 Latin + 8 Japanese). The free version only ships with the default Noto Sans JP.
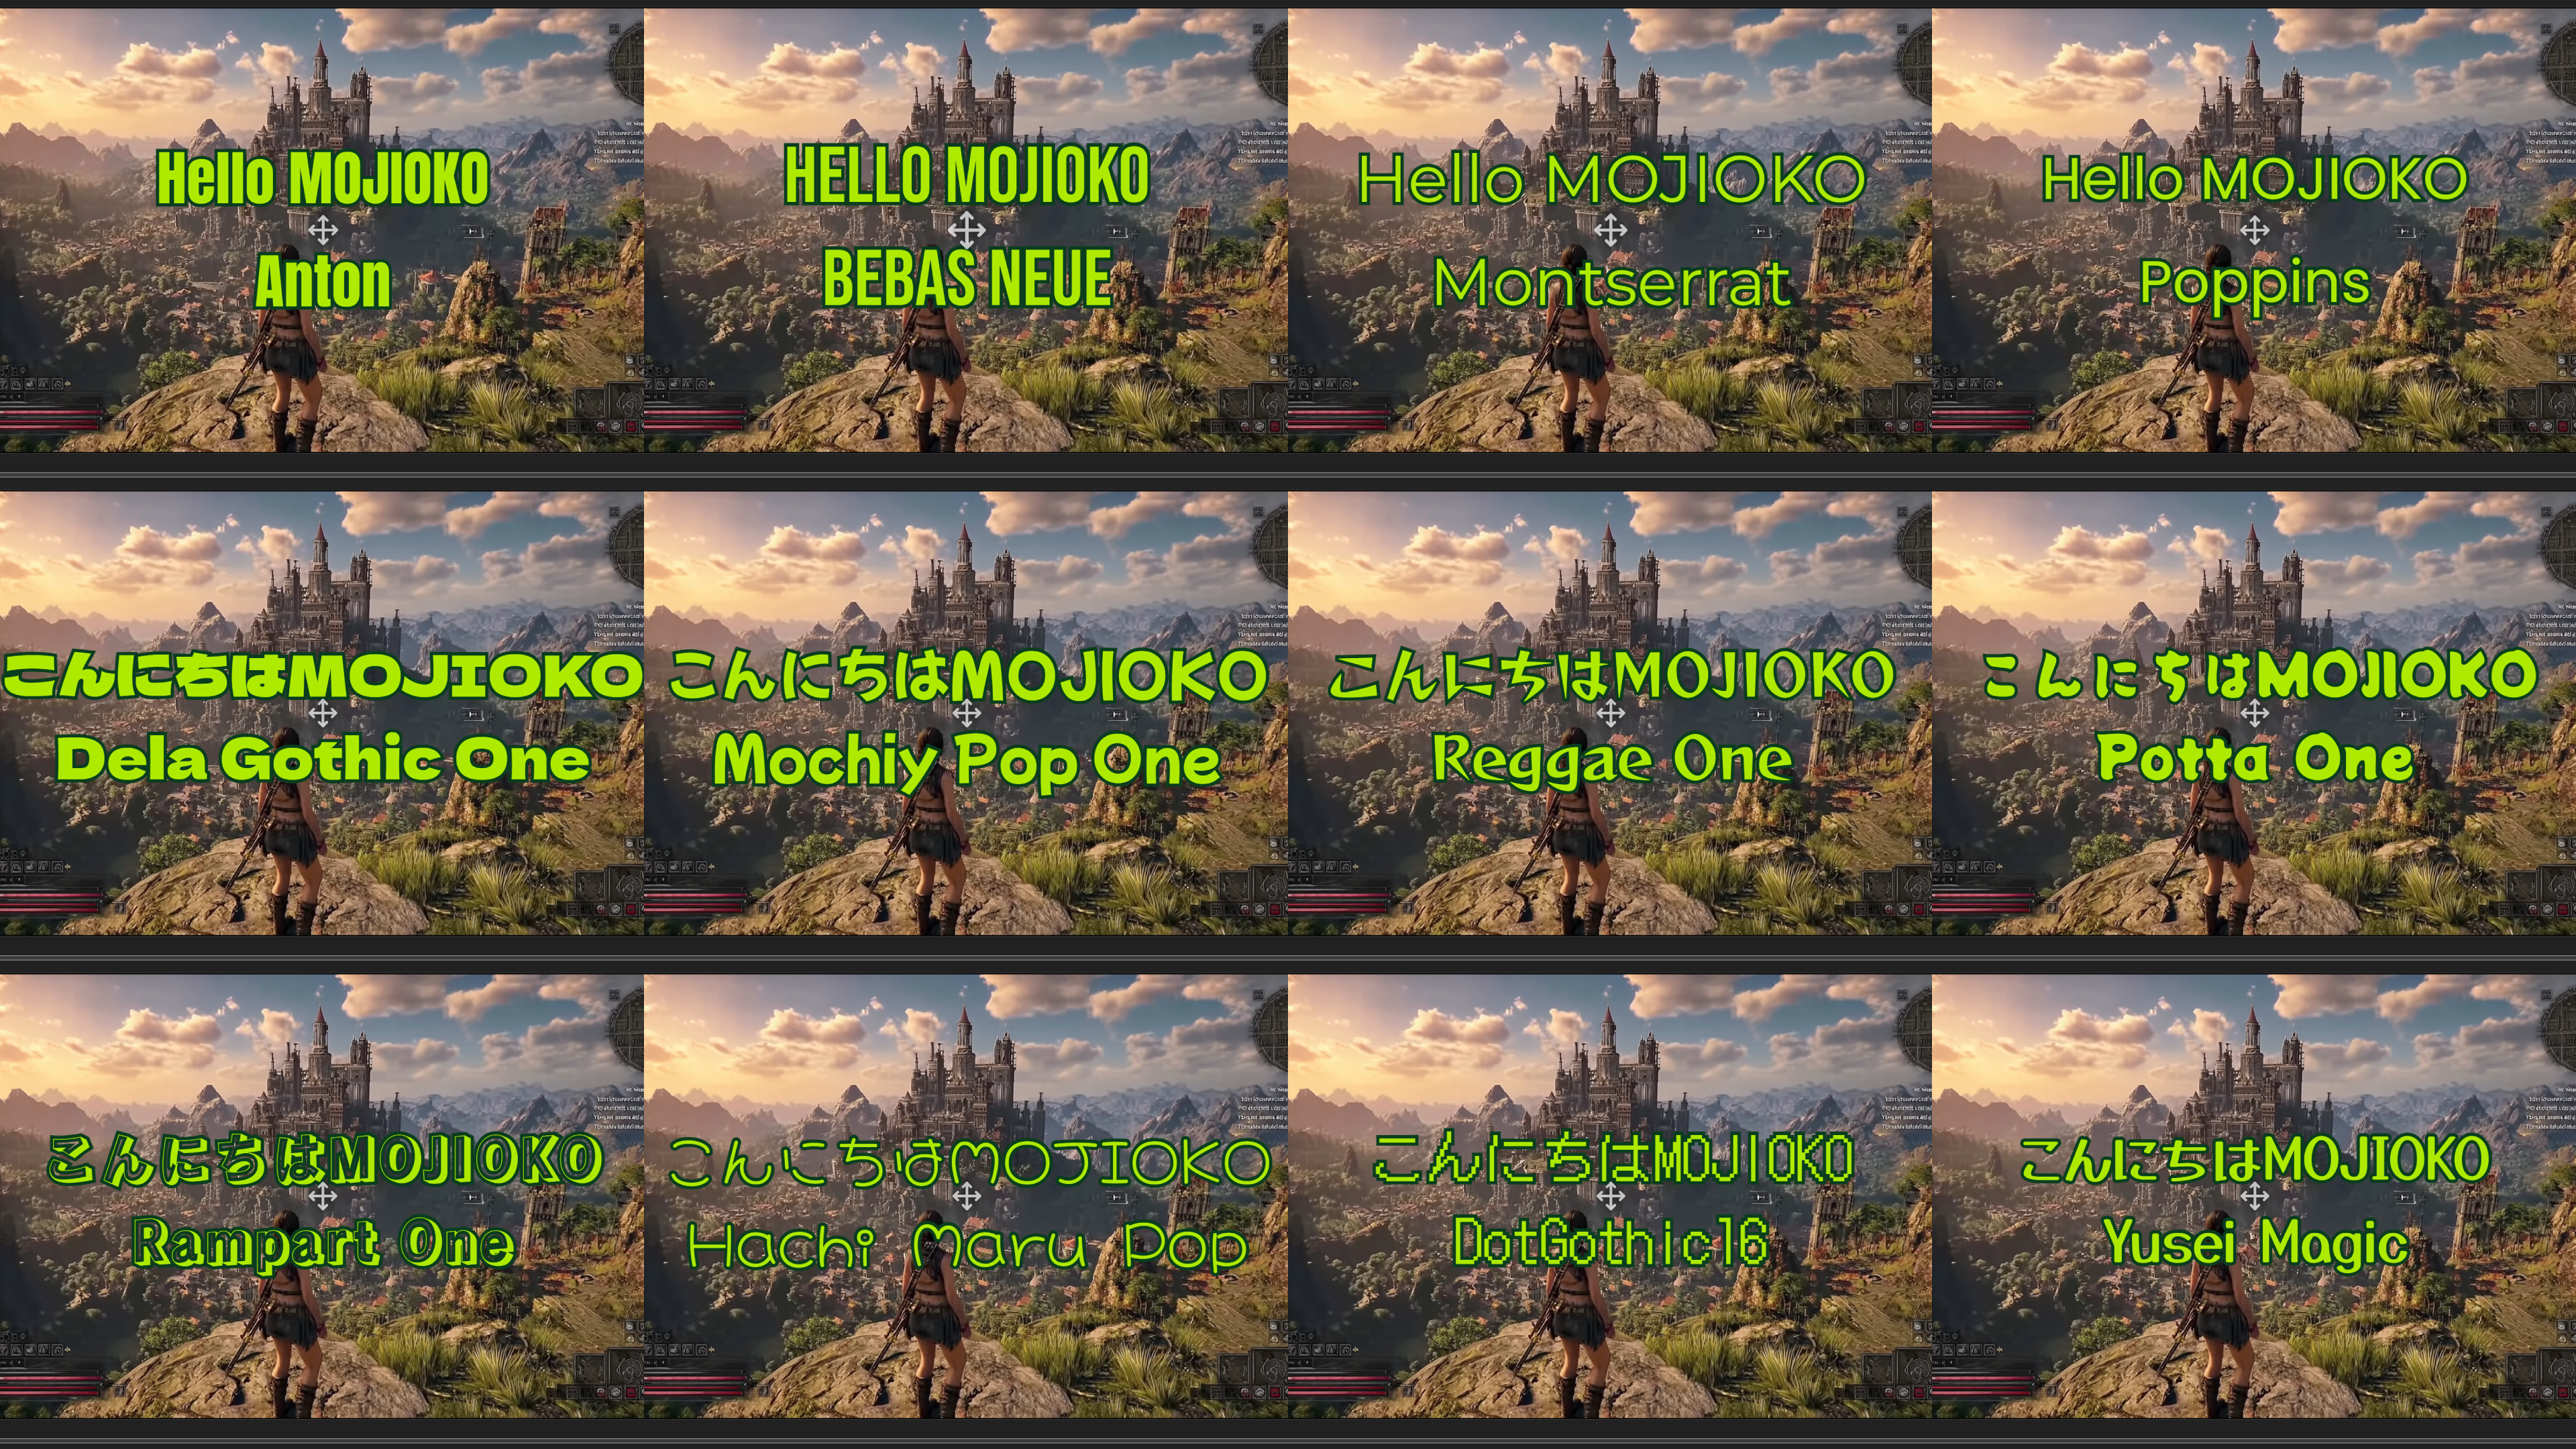
The 12 fonts, listed in the sample sheet's reading order (left to right, top to bottom — 4 Latin faces first, then 8 Japanese faces):
- Anton
- Bebas Neue
- Montserrat
- Poppins
- Dela Gothic One
- Mochiy Pop One
- Reggae One
- Potta One
- Rampart One
- Hachi Maru Pop
- DotGothic16
- Yusei Magic
Info [Experimental] English subtitles chunked every 2–3 words
MOJIOKO has an experimental feature that splits an English transcription into short chunks of 2–3 words, producing the fast-paced snippet-style subtitles common on Shorts / TikTok / Reels — all the way to a draft you can edit.
Note that this feature is tuned for English transcription. It does not work well for Japanese, where word segmentation works differently. It is intended for use with English audio.
Why we call it "experimental"
Because the split is driven purely by word count (2–3 words), it does not always land on a natural semantic boundary. Hyphenated words can be split in half, and the break between a short phrase and a long noun phrase can end up somewhere unexpected. Treat the output as an editing draft rather than a finished product, and touch up the boundaries where needed.
Demo videos (side-by-side)
The two videos below show the same English audio processed with (1) the regular transcription feature and (2) the experimental word-chunk feature.
▼ 1. Regular transcription
▼ 2. Experimental word-chunk subtitles (2–3 words per chunk)
Attribution (CC BY)
The video footage used in this demo is a work by Tech Steve, published under the Creative Commons Attribution license (CC BY).
Original video: https://www.youtube.com/watch?v=OfIlTM3cyDg
Info After transcription — how to finish your subtitles
Once transcription is done, you finish your subtitles in STEP 2. The overall flow is (1) fix the content → (2) style the look → (3) set the position → (4) translate (optional) → (5) export. Here is what you can do at each stage.
1. Fix the content (list view / timeline view)
In the list view you can edit each subtitle's text and its start / end times directly; it stays quick even with thousands of subtitles. Switch to MOJIOKO's timeline view to drag and resize subtitle blocks and adjust timing visually, and click on the track to move the playback position there. (This is separate from the DaVinci Resolve timeline mentioned further down this page.)
2. Style the look
Karaoke highlighting — words change colour as they are spoken. Per subtitle you can choose between "Switch" (each word flips when it starts) and "Sweep" (the colour fills across each word), and you pick both the spoken and unspoken colours. Subtitles created by transcription follow the actual speech timing; imported or hand-typed subtitles split the display time evenly instead.
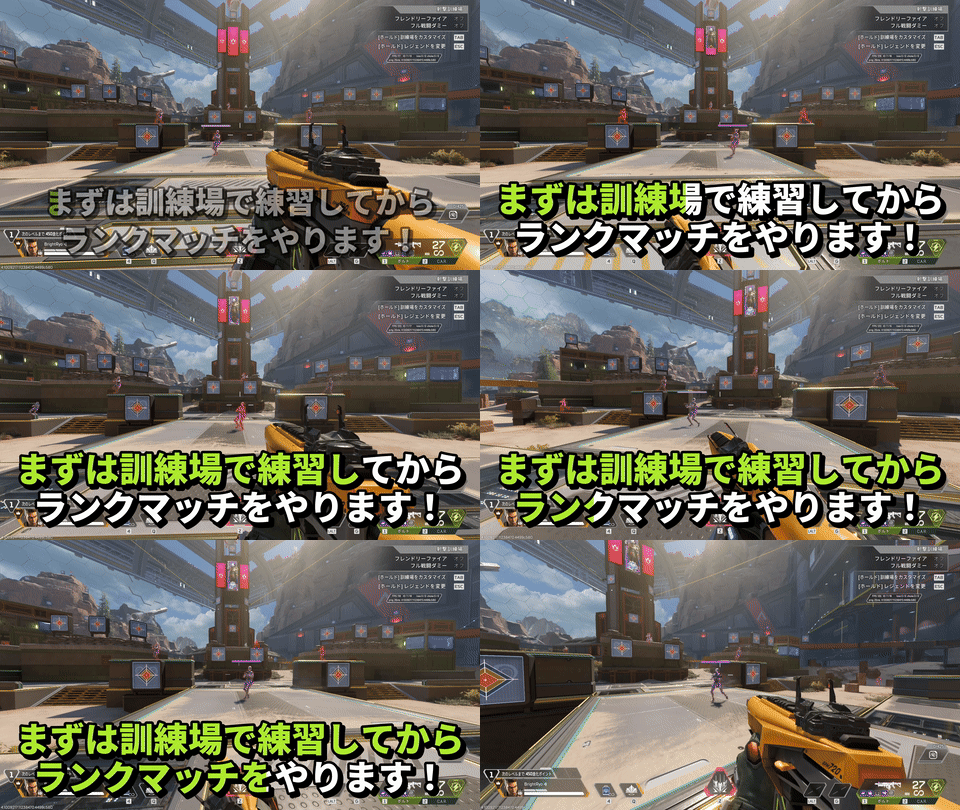
Keyword emphasis — give chosen words their own colour and size so a single phrase stands out from the line.
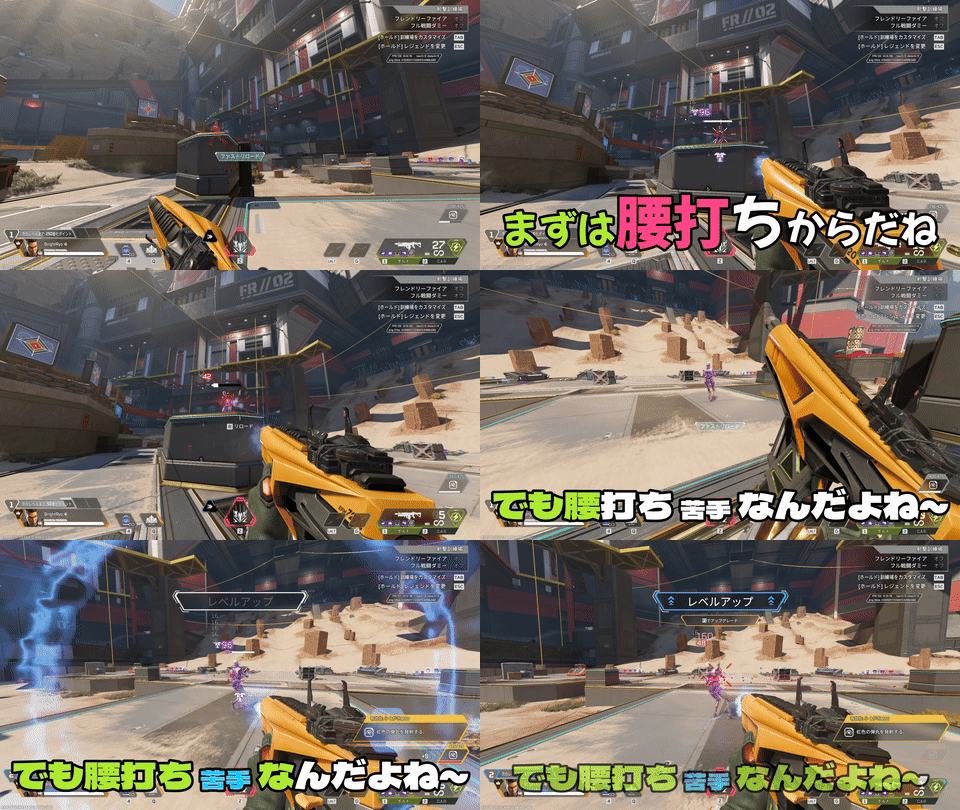
Appear / disappear animations — choose from fade, scale, pop, and blur, with adjustable duration and strength.
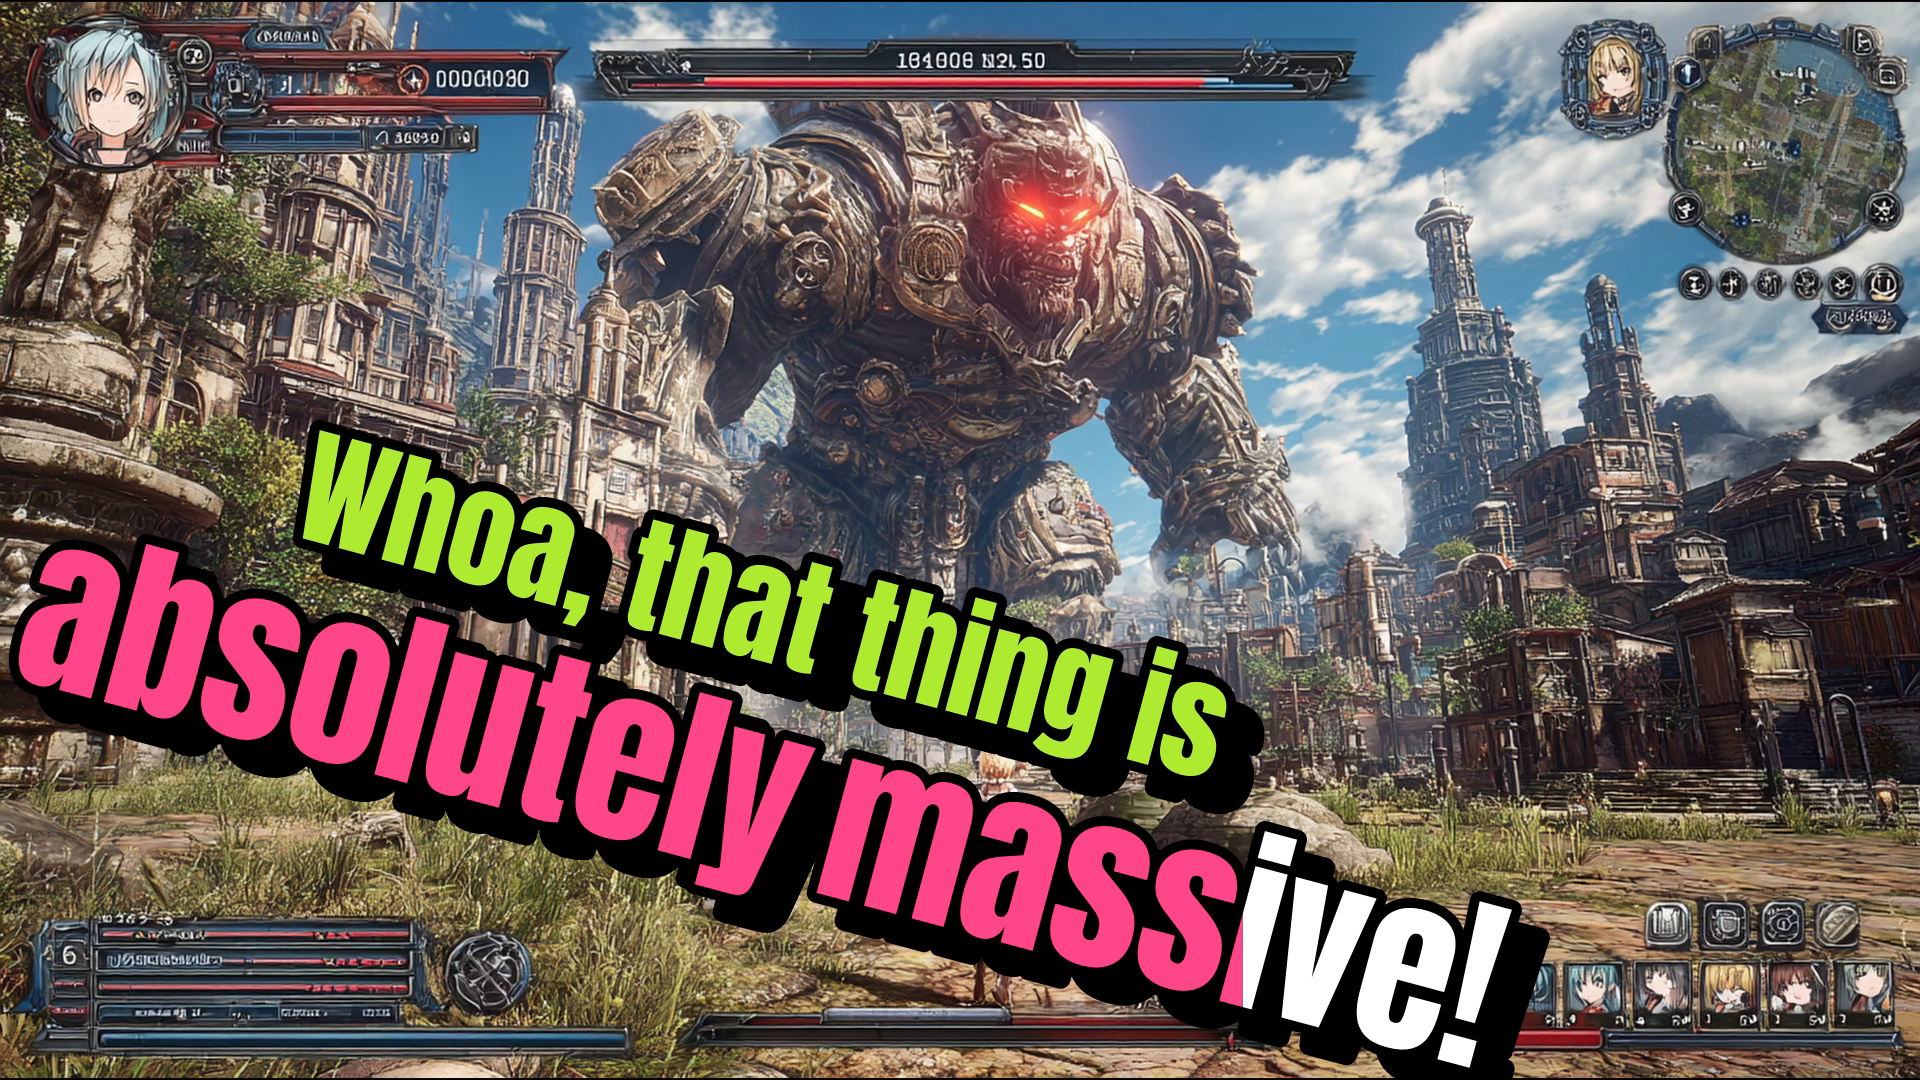
Colour, outline, shadow, opacity, line spacing, rotation, ALL CAPS — fine-tune the details: text and outline colour, drop shadow, text and outline opacity (set separately — making the text transparent while keeping the outline gives you hollow lettering), line spacing, rotation, and upper-casing Latin text.
Style presets — save a look you have built and apply it to other subtitles in one click.
3. Set the position
Choose where the subtitle sits (vertical and horizontal placement). For vertical short-form video you can also offset a subtitle well past the frame edge.
4. Translate (optional)
You can translate your subtitles into another language. The translation engine is downloaded once, the first time you use it. Your video and audio are never uploaded.
5. Export
When your subtitles are ready, burn them into the video, or export them as SRT or plain text.
Info [Advanced] Driving MOJIOKO from an AI assistant (AI integration)
MOJIOKO supports MCP (the Model Context Protocol), so an AI assistant such as Claude can run transcription, translation, and subtitle burn-in for you.
From Settings → AI integration, export the connection bundle (.mcpb) and load it into Claude Desktop to connect. You can also run the same operations from the command line (mojioko).
This is an advanced feature; only an overview is given here.
Important OBS Settings for Accurate Transcription
To achieve high-accuracy transcription with MOJIOKO, it's important to record your microphone audio on a separate audio track during recording.
Why is this necessary?
If game BGM, sound effects, and in-game voices are recorded on the same audio track as your microphone, Whisper will have difficulty distinguishing between "is this someone speaking?" or "is this music or sound effects?" This significantly reduces transcription accuracy.
The Solution
By recording your microphone audio on Audio Track 2, you can then configure MOJIOKO to "transcribe only Track 2", enabling high-accuracy transcription.
※ The video file remains as a single file, but internally contains multiple audio tracks.
How to Configure OBS Audio Tracks
▼ Settings Window
- Open OBS "Settings"
- Select "Output" from the left menu
- Change "Output Mode" to "Advanced"
- Select the "Recording" tab
- Check "Audio Track 2"
- Click "Apply" → "OK"
▼ Audio Mixer Settings
- Click the "Options" button in the audio mixer on the main screen
- The "Advanced Audio Properties" window opens
- Check "Track 2" in the row for your microphone
- Close
MOJIOKO Settings
Load the recorded video file in MOJIOKO and select "Track 2" as the transcription target audio track. This enables high-accuracy transcription focused only on your microphone audio.
Important "Windows protected your PC" appears during installation
This is a warning from Microsoft's SmartScreen feature. MOJIOKO is currently not code-signed, so this warning appears on first installation.
How to Proceed
- Click "More info"
- Click the "Run anyway" button that appears
- The installer will launch
About Safety
This application's full source code is published on GitHub, and no data is transmitted externally. See MOJIOKO's privacy policy for details.
Info About GPU acceleration
MOJIOKO can use an NVIDIA GPU to speed up transcription substantially. Long videos finish in a fraction of the time compared to CPU. A GPU is not required — MOJIOKO runs on CPU without one.
Supported GPUs
NVIDIA GPUs only. AMD and Intel GPUs are not supported (transcription automatically runs on CPU on those machines).
The latest NVIDIA generations, including RTX 50 series (Blackwell), are supported.
CUDA / cuDNN runtime download
To use GPU acceleration, the app needs to download the CUDA / cuDNN runtime (~1.1 GB). Selecting "Use GPU" in the app triggers this one-time download automatically. You do not need to install NVIDIA's CUDA toolkit yourself beforehand.
This is a separate download from the Whisper model (~1.5–3 GB). Both are required for GPU transcription.
Once downloaded, no further downloads are needed. You can delete it from inside the app to reclaim disk space.
CPU vs GPU
If you select "Use CPU," transcription always runs on the CPU even when a GPU is available. Your selection is respected.
CPU is fine for short clips or one-off jobs; GPU is worth it for long videos or repeated transcription passes.
Drivers
If your NVIDIA driver is out of date, you may need to update it. Use GeForce Experience or download the latest driver from NVIDIA's site.
Info Which Whisper model should I download and use?
You can choose from 2 models in the in-app "Whisper Model" screen. We recommend large-v3.
large-v3 ★ Recommended (High Accuracy)
- File size: ~3 GB
- Strength: Highest accuracy
- Requirements: Needs more system resources (16 GB+ RAM recommended)
Start here. Reliable accuracy for Japanese transcription and a wide range of audio.
large-v3-turbo Fast & Lightweight
- File size: ~1.5 GB (about half of large-v3)
- Strength: Fast and lightweight
- Requirements: Lighter than large-v3
Use when large-v3 feels heavy or slow, or when you want a lighter download. In Japanese transcription, turbo tends to produce more recognition errors than large-v3.
How to Choose
- Start with large-v3 (recommended)
- If it feels heavy or slow, or you want a lighter download → switch to large-v3-turbo
About the legacy models (small / medium)
- The small and medium models were discontinued in v1.3.0.
- If you previously selected small or medium, your setting is automatically migrated to large-v3 on launch (no action needed).
- Any previously downloaded small / medium files are not deleted automatically. You can remove them manually from the "Whisper Model" screen via "Open models folder".
Notes
- Downloaded models are saved and ready to use next time
- You can switch between the two models
- You can download models anytime from the "Whisper Model" screen
- Keep the app open during download
Info How to export subtitle data only
In addition to burning subtitles into video, MOJIOKO can export subtitle files and text files separately.
Available Output Formats
■ Text (.txt)
- A simple text file with subtitle texts listed in order
- No timing information, just the text content
- Use cases: Blog article drafts, transcription review, meeting notes, importing into AI text-to-speech tools, etc.
■ SRT (.srt) Subtitle File
- A widely-used subtitle format supported by video players and editors
- Each subtitle includes display timing
- Use cases: Importing subtitles into other video editors, uploading to YouTube, importing to Premiere Pro / DaVinci Resolve / CapCut, etc.
How to Export
After transcribing, use the "Export text" button at the bottom of the editing screen.
- Click the "Export text" button
- Choose "Text" or "SRT"
- Click save, then choose the destination to export
Use Cases
■ Generate AI voice with text-to-speech tools
- Transcribe in MOJIOKO → "Export as text" to save as text
- Import into AI voice synthesis tools (e.g., VOICEVOX, ElevenLabs) to generate character voices
- Replace original audio with AI-generated voice for content creation
Perfect for converting gameplay commentary to AI voice, or swapping your own voice with character voices.
■ Edit in DaVinci Resolve timeline
- Transcribe in MOJIOKO → "Export as SRT" to save SRT file
- Import the SRT file into DaVinci Resolve's media pool
- Drag it onto the timeline — subtitles are automatically placed with their start/end timings
If MOJIOKO's subtitle design doesn't fit your needs, you can freely customize fonts, colors, and animations in DaVinci Resolve. Timing is already handled by MOJIOKO, so you can focus on visual design.
Note: If the timing looks off after import, see the section below "Notes for using SRT files in DaVinci Resolve."
■ Add subtitles to YouTube (without burning in)
- Transcribe in MOJIOKO → "Export as SRT" to save SRT file
- Upload your video in YouTube Studio
- Upload the SRT file from the Subtitles tab
No need to burn subtitles into the video; viewers can toggle subtitles ON/OFF. Subtitles are also indexed by YouTube search for SEO benefits.
■ Edit captions in Premiere Pro or CapCut
- Transcribe in MOJIOKO → "Export as SRT" to save SRT file
- Import using your editor's caption feature
- Adjust appearance (font, color, position) in the editor
■ Reuse as a blog article or script
- Transcribe in MOJIOKO → "Export as text" to save as text
- Open the text file in your editor
- Format and use as a blog article or script
Great for gameplay recap articles, text versions of video content, etc.
Notes
- Both output formats reflect text edits made in the editing screen
- Lines excluded from output (marked as deleted) are not included
- Can be combined with video rendering (export both subtitle file and video)
Info Notes for using SRT files in DaVinci Resolve
MOJIOKO exports SRT files with correct timing, but when you import them into DaVinci Resolve the timing can look "off." This comes from how DaVinci Resolve works — the points below will sort it out.
■ 1. Set the timeline start to 00:00:00:00
By default, DaVinci Resolve timelines start at 01:00:00:00 (one hour). With this default, an SRT that starts at 00:00:00 is placed at the "one hour" position, so everything looks shifted by an hour. In the Media Pool, right-click the timeline → "Change Timeline Start Timecode" → set it to 00:00:00:00. The SRT times will then line up with what is shown.
■ 2. Match the timeline frame rate to your source video
DaVinci timecode is HH:MM:SS:FF, where the last field is frames, not milliseconds (e.g. at 30fps, 1 second = 30 frames; at 60fps, 1 second = 60 frames). So the SRT's ",900" (milliseconds) and DaVinci's ":54" (frames at 60fps) both refer to the same 0.9 seconds — the numbers look different but point to the same time. Also set the timeline fps to the same fps as the video you transcribed; if they differ, subtitles gradually drift from the video over longer durations.
■ 3. Import steps
Import the SRT into the Media Pool, then drag it to the start of a subtitle track (the timeline start). Each subtitle is placed at its start/end time automatically. With steps 1 and 2 set up, the subtitles keep exactly the timing you adjusted in MOJIOKO.